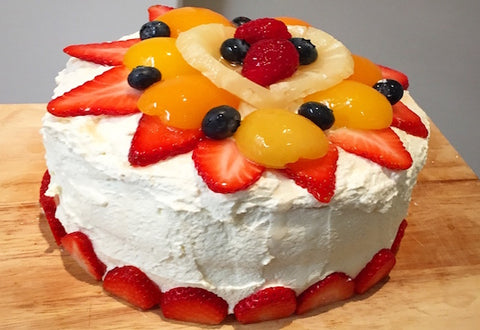
Here's what you'll need to make these childhood favourites:
You'll also need a gingerbread man shaped cutter, or a very steady hand!
It's easy to get the dough together for this one, the majority of the work is in the cutting. To start, mix all of the dry ingredients together in a large bowl. In a separate bowl mix together the egg, Pure Health MCT Oil and sweetener of your choice (if using one).
Now you simply need to mix the two together. Slowly as the wet mixture to the dry, a small amount at a time until the mixture starts to form a dough.
Now for the fun part! Use a little almond flour on your surface (to prevent the dough sticking) and roll out the dough until roughly 1/2cm thick. Using a cookie cutter, or a knife if cutting by hand, cut out your gingerbread men and add them to a greased backing tray. You can also use parchment paper, it's an easier and cleaner method than greasing. Keep re-rolling the dough until you've used it all up, this recipe makes around 15 cookies.
They're pretty simple to make and taste just as good as the 'real' ones - this has been verified by many of our friends!
For the pastry
For the filling
Ok, let's get started with the pastry. Melt your butter in a small pan then whisk in the egg. Add this to the ground almonds slow and mix until a dough is formed. You can either use pastry cases to create the moulds or a cake tin, which is what I opted for. Mould the pastry into small tarts and set to one side whilst you prepare the filling. Ensure you leave around 10% of your pastry for the star toppers to add at the end once filled.
For the filling you can really pick and choose what you add. If one of the ingredients doesn't take your fancy you can substitute it or remove it completely it's up to you.
Chop the dates into small piece then peel and chop the apple similarly. Juice the orange and lemon and peel the rind from the orange. Next you can simply throw everything into a pan and simmer for 15 mins - the smell is divine! Leave to cool them blend briefly with a stick blender to smoothen it out a little.
Fill each pastry case until level then use your remaining pastry to cutter toppers. I used a star cutter but go crazy, it is Christmas after all! Pop the toppers on then bake for around 15 mins at 180C or until they start to turn golden brown.
]]>
Enjoy!
]]>
This cake is super simple to make with just four ingredients - eggs, butter, MCT oil & chocolate! It's a really indulgent cake which is great for a special occasion. Switch out the butter for goats butter or coconut oil for a great tasting dairy free option.
]]>This cake is super simple to make with just four ingredients - eggs, butter, MCT oil & chocolate! It's a really indulgent cake which is great for a special occasion. Switch out the butter for goats butter or coconut oil for a great tasting dairy free option.
Here's what you'll need:
Optional:
To get started, heat a pan of water on the stove and add a glass bowl to the top of the pan. Add the chocolate and butter to the bowl and allow it to melt.
Next lets separate the eggs. The egg whites are an important element to this recipe, without flour these are responsible for the height and consistency of the dough. Whip the egg whites with an electric whisk until they are very stiff.
Add the egg yolks to the chocolate/butter/MCT oil mix to form a smooth paste then add in a pinch of salt to enhance the flavour. Take the egg whites and slowly fold these into your paste just a little at a time ensuring you don't overwork the mixture.
Now that the mixture is ready split is equally into two parts. Empty one half into a well greased baking tin - or 2/3 shallow tins if you want to make a layered cake, then put into your pre-heated over and bake for 20 mins at 160C. In the meantime, refrigerate the other half of the mixture.
Once baked allow to cool on a cooling rack until completely cold. Remove the left over mixture from the refrigerator and add to the top of each cake and layer them up, finally top with mixture like frosting. Add the berries to the top (or not!) and enjoy!
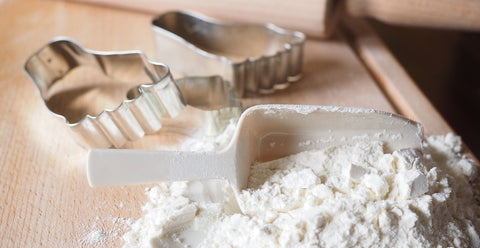
Ok, lets start with the pastry base, here’s what you’ll need:
Melt the butter on the hob then mix in the Pure Health MCT oil. For those who are dairy intolerant or dairy free by choice, goats butter, ghee or just a double portion of MCT Oil will work just as well. Next, whisk the egg until smooth and add this to your mixture of fats. In a separate bowl measure out the ground almonds.
Now you're going to mix the fats into the almonds to form the pastry so continually add small amounts of the fats and blend in (I found it easiest to use the back of a spoon for this) until the almonds start to bind together. If you pour all the fats in at once this will be a much more difficult process - trust me!
You can add beans or rice to bake but the dough is heavier than a flour base so it should keep its form on its own. Pop it in the over for 10-15mins until slightly golden and beginning to harden. Leave to cool fully, you might want to pop it in the fridge whilst you make the filling.
Now for the chocolate! Here’s what you’ll need for the filling:
This part is super easy and there’s no further baking required. Melt the butter and chocolate together to form a shiny paste. Add to this the collagen, cocoa powder, vanilla and salt then mix well. Finally, add in your cream a small portion at a time whilst continually whisking the mixture. An electric whisk makes this easier and gives a smooth finish but its not essential.
Try not to eat the mixture! Grab your pastry case and make sure it is fully cooled otherwise the filling might curdle. Pour your filling into the pastry case and refrigerate for at least 3 hours until set.
Here's what you'll need:
Preheat the oven to 175C.
Start with your dry ingredients in a bowl and mix them all together. NOTE if you are using powdered sweetener then save this until the end so you can test for the desired amount.
In a separate bowl, whisk the two eggs until smooth then add the almond milk and MCT oil and blend. Slowly add the wet mix to the dry and mix until smooth.
I used a silicon donut mould from Amazon, silicon is great for donuts because you can easily push them out once cooked without any sticking. I also made ring donuts with this same recipe and a ring donut mould. The picture is terrible but here you go!
Bake for roughly 20 mins but start checking from 15mins in as you don't want to over-bake and dry out the end result. They're cooked when they've turned lightly golden brown, any darker and they're over baked.
Set aside to cool on a wire rack.
For the topping of the blueberry donut simply mix together cream or yogurt with cream cheese and crushed blueberries. You could also make a quick chocolate icing or pump with jam.
Enjoy!
]]>Why do we love peanut butter so much? Here's a super quick and simple way to get your nut butter fix - along with your daily collagen dose! These are so crumbly and so delicious you'll struggle not to eat them all at once!
Enjoy!
]]>We love lemons in the summer, they're so refreshing, and what better way to enjoy them in a delicious, low carb ice cream! Bonus points - its really quick to throw together and there's no baking involved.
Here's what you'll need:
You can switch out the almond milk for any other milk alternative such as coconut or soy and it wont affect the recipe.
There are two ways to make ice-cream:
So, once you've decided on your method you need to get your mixture ready to freeze. It's really just a case of putting everything together in a bowl or mixer and blending until smooth. It's advisable to save the sweetener until the mixture is ready then add slowly and taste until it's to your liking.
You can take this recipe and change the flavour, anything fruit based will work. If you have a sweeter tooth then we'll be posting a great chocolate ice cream recipe soon!
]]>This Easter keto cake really does taste as good as it looks!!! It's quick & easy to make & at just 2.5g carbs per slice what's not to love?!
It's sugar free & gluten free - switch out the cream for coconut cream and its dairy free too! We've also included a healthy dose of collagen for some added protein
Here's what you'll need:
200g ground almonds
45g collagen powder
7 eggs
2tbs MCT Oil
50ml almond milk
Sweetener of choice to taste
300ml whipping or double cream
8 strawberries
Your choice of fruit to top
Start by preheating the oven to 170C.
Separate the eggs then beat the whites until they’re very stiff - you should be able to turn the bowl upside down without anything falling out. Next, whisk together the yolks, almond milk, MCT oil & sweetener (if using).
Add the ground almonds & collagen powder to the eggs mixture and combine into a smooth paste. Now fold in the egg whites but be careful not to overwork the mixture.
Split the mixture evenly between 3 cake tins then bake for 15 mins @ 170C until golden brown and springy. Once baked allow to cool completely on a wire rack.
Next the fun part! Whip up 300ml of whipping or double cream until fairly stiff and slice 6 strawberries into thin slices. Layer your first cake with cream followed by strawberry slices, repeat with your second cake and place on top then add your third cake. Imagine a game of Jenga with the topple at the end!
Now cover the entire cake in a thin layer of cream and create a pretty fruit display on top! I wanted to add nuts to the sides (maybe flaked almonds) but ran out of shopping time - maybe you can give it a try!
]]>
Boost your morning coffee and make it ‘bulletproof’ by adding cacao butter. By switching out dairy that’s traditionally used in the bulletproof coffee and using cacao butter as the base, it gives the coffee a subtle hint of chocolate and makes it super creamy. Perfect for those looking to start the day with a dairy-free drink.
Ingredients
Optional toppings
A dusting of CHOC Chick Cacao Powder or CHOC Chick Cinnamon Cacao
Pour your freshly brewed coffee into a blender along with the cocoa butter, MCT oil, coconut cream and sweetener (if using).
Blend until smooth and frothy.
Serve immediately.
We love the products at CHOC Chick to add a twist to our usual BPC routine, head over to their website if you fancy adding a little extra.
]]>Being homebound for the foreseeable future, it's a great time to experiment in the kitchen - especially when you have no choice but to use what's in the cupboards! This creation was exactly that and it turned out pretty well......evident by the fact it was all eaten within 24 hours!
]]>For the cake⠀
⠀
50g Desiccated coconut⠀
125g Ground almonds⠀
4 Eggs (separated)⠀
1 tsp GF baking powder⠀
1 tsp Raw vanilla⠀
2 Scoops Pure Health Collagen⠀
Optional sweetener of choice to taste ⠀
⠀
For the frosting⠀
⠀
150g Cream cheese⠀
Juice of 1/2 lemon⠀
50g Grass-fed butter⠀
1/2 tsp Raw vanilla⠀
Preheat the oven to 175C and line a baking tin with greaseproof paper. You can simply grease the tin with butter or coconut oil if you don't have any greaseproof paper lying around.
In a large bowl mix together the dry ingredients. In another bowl, separate the eggs then whisk the whites until stiff peaks are formed. Next, whisk the egg yolks until they are light and fluffy. If you are using sweetener then now is the time to add it, if its powdered then whisk it into you to your egg whites and if its liquid add it to your yolks. ⠀
⠀
Mix your egg yolks into your dry ingredients then slowly fold in the whites. The constancy will seem a little lumpy but thats fine!
Bake for 18-20mins at 175C. Keep an eye on the cake as it will dry out quickly if its over-baked, you'll know its ready when the top turns golden brown and a knife comes out clean.
⠀
For the frosting, work the butter until smooth then add in the cream cheese and combine. Add the vanilla and lemon juice and mix well. ⠀
⠀
Once cooled you can ice the cake….and then eat it all because there’s nothing better to do right now!⠀
It's hard not to love this indulgent Italian classic, coffee & chocolate is a match made in heaven! Here we've replaced the usual sugary savoiardi with delicious low carb almond sponges, in a healthy twist on this traditional classic. Enjoy!
Here's what you'll need:
For the sponges:
For the Tiramisu cream:
A quick word on the honey - yes we know it's not the 'healthiest' choice of sweetener but its does go so well with almonds. However, the honey adds nothing but taste so you can simply make the sponges without it - or add another sweetener of your choice. That's that one sorted.
Ok, lets get started on the sponges. Start by separating the eggs and beating the whites until they’re very stiff. We do this a lot in our recipes because this method helps the cake to rise without the need for flour or baking powder - two things we know you try to avoid!
Next, whisk together the egg yolks with the honey (or alternative sweetener of choice). Mix together the ground almonds & collagen then add in a little bit at a time, it'll be much harder all at once, until fully mixed and a paste has formed. Now slowly fold in the egg whites being careful not to overwork the mixture.
Add to a greased tin (I used a 20cm round so the sponges would fit my Tiramisu bowl) then bake for 25 mins at 170C. Leave until completely cool on a wire rack, if you remove the sponge too soon it will fall.
Leave to cool.
Now lets get started on the Tiramisu cream - whisk the egg yolks until smooth. In a separate bowl, whisk together the double cream and mascarpone until completely smooth with a thick consistency. Next, gently fold the cream/mascarpone into the egg mixture with a spatula, do this slowly to keep keep the mixture light and fluffy.
Once your sponge has cooled, slice into fingers ready to line your Tiramisu bowl. Pour your coffee into a small bowl and quickly dunk each sponge finger in until completely absorbed with coffee. Almond sponge is delicate so you'll need to be quick here or the sponge will start to break.
Add a layer of soaked sponges to your Tiramisu bowl followed by a layer of cream. Add another layer of fingers to the bowl then the remainder of the cream and spread evenly.
Dust the Tiramisu with cocoa and flaked chocolate and leave to set in the fridge for at least 4 hours - this part is tough we know!
]]>Here's what you'll need to make these delicious cookies:
It's easy to get the dough together for this one, the majority of the work is in the cutting. To start, mix all of the dry ingredients together in a large bowl. In a separate bowl mix together the egg, Pure Health MCT Oil and sweetener of your choice (if using one).
Now you simply need to mix the two together. Slowly add the wet mixture to the dry, a small amount at a time until the mixture starts to form a dough.
Once your dough is ready you can add in the chocolate chunks, try to spread these evenly throughout the dough and work its as little as possible to avoid them melting.
I recommend using parchment paper for this part to prevent the dough sticking and keep it flat, I use one piece below and one above like a parchment sandwich then roll out the dough until roughly 1/2cm thick. Using a cookie cutter, mug edge or a knife if cutting by hand, cut out your cookies and add them to a greased backing tray. You can also use parchment paper for baking, it's an easier and cleaner method than greasing. Keep re-rolling the dough until you've used it all up, this recipe makes around 15 cookies.
Super gooey and totally delicious, these indulgent chocolate brownies are completely flourless and with just five base ingredients they're quick and easy to make. Switch out the butter for goats butter or coconut oil for a great tasting dairy free option.
Optional:
To get started, heat a pan of water on the stove and add a glass bowl to the top of the pan. Add the chocolate and butter to the bowl and allow it to melt.
Next lets separate the eggs. The egg whites are an important element to this recipe, without flour these are responsible for the height and consistency of the dough. Whip the egg whites with an electric whisk until they are very stiff. Next, in a separate bowl, add the MCT oil and salt to the full egg and whisk the until smooth.
Add the egg mixture to the chocolate/butter mix to form a smooth paste then add in the collagen and a pinch of salt to enhance the flavour. Take the egg whites and slowly fold these into your paste just a little at a time ensuring you don't overwork the mixture.
Now that the mixture is ready split is equally into two parts. Empty one half into a well greased baking tray then put into your pre-heated over and bake for 30 mins at 160C. In the meantime, refrigerate the other half of the mixture.
Once baked allow to cool on a cooling rack until completely cold. Remove the left over mixture from the refrigerator and add to the top of the baked batch like frosting. Cut into squares and add the berries to the op (or not!) and enjoy!
Here's what you'll need:
The sponge is our simple 3 ingredient almond cake which is super quick and easy to make.
Start by separating the eggs and beating the whites until they’re very stiff. We do this a lot in our recipes because this method helps the cake to rise without the need for flour or baking powder - two things we know you try to avoid!
Next, whisk together the egg yolks with the honey (or alternative sweetener of choice) and almond milk (or alternative milk of choice). Add in the collagen powder followed by the ground almonds a little bit at a time, it'll be much harder all at once, until fully mixed and a paste has formed. Now slowly fold in the egg whites being careful not to overwork the mixture.
Split the mixture into three greased tin's (I used a 20cm round tins but go crazy and choose whatever takes your fancy) then bake for 15-20 mins at 170C. Leave until completely cool on a wire rack, if you remove the cakes too soon they will fall.
Now for the fun part! Using an electric whisk (or a very enthusiastic wrist!) whisk the whipping or double cream until fairly stiff and slice 6 strawberries into very thin slices.
Layer your first cake with cream followed by strawberry slices, then place your second cake on top of the first. Add cream and strawberries to the top of the second tier and add the third cake to the top of the stack. Now cover the entire cake in a thin layer of cream ensuring no sponge is showing through. Lastly you can have fun creating a pretty fruit display on top, cacao nibs would also be great! I wanted to add nuts to the sides (maybe flaked almonds) but ran out of shopping time - maybe you can give it a try!
]]>
Here's what you'll need:
Yup that's it! A word on the honey - yes we know it's not the 'healthiest' choice of sweetener but its does go so well with almonds. However, the honey adds nothing but taste so you can simple make the cake without it or add another sweetener of your choice. That's that one sorted.
Start by separating the eggs and beating the whites until they’re very stiff. We do this a lot in our recipes because this method helps the cake to rise without the need for flour or baking powder - two things we know you try to avoid!
Next, whisk together the egg yolks with the honey (or alternative sweetener of choice). Add in the ground almonds a little bit at a time, it'll be much harder all at once, until fully mixed and a paste has formed. Now slowly fold in the egg whites being careful not to overwork the mixture.
Add to a greased tin (I used a 20cm round but go crazy and choose whatever takes your fancy) then bake for 25 mins at 170C. Leave until completely cool on a wire rack, if you remove the cake too soon it will fall. That's it! Super quick and simple, now cut it and try not to eat the whole thing at once - we dare you!
]]>Here's what you'll need:
Lets get started! Separate the eggs into two bowls and whisk the egg whites until very stiff, you'll know they're right if you can turn the bowl upside down and the whites stay put! Whisk the egg yolks separately until pale and creamy.
Mix together the dry ingredients - coconut flour, baking powder, Pure Health Collagen and cinnamon. Melt the butter in a bowl over a hot pan of water then add to the egg yolks and whisk until smooth. Next add this to the dry mixture and blend together. Lastly add the cream.
Ok we're ready to mix in the egg whites, this needs to be done slowly and carefully to keep the air beaten into them. Mix in the whites a small amount at a time, being careful not to over-beat the mixture, until everything is combined in one bowl.
We used a waffle maker to bake these but the great thing about this recipe is that it can also be used to make pancakes! So if you're a waffle maker down then simply grab a frying pan and some butter and use the batter to make pancakes.
If you're using a waffle maker - grease the plates with butter then add the batter and bake for 3 - 5 minutes until golden. Once ready you can eat these alone or add a whole range of things, we personally love them with bacon, blueberries and pecan butter!
This is a simple recipe in two parts which are combined together in the tin just before baking. This part ensures that great swirl effect is achieved which gives them such fabulous presentation rights!
To make the the chocolate part you'll need:
Optional:
To make the the cheesecake part you'll need:
Optional:
Before we begin, pre-heat your oven to 160C.
So let's get started with the chocolate part. Heat a pan of water on the stove and add a glass bowl to the top of the pan add the chocolate and butter to the bowl and allow it to melt.
Next lets separate the eggs. The egg whites are an important element to this recipe, without flour these are responsible for the height and consistency of the dough. Whip the egg whites with an electric whisk until they are very stiff. Next, in a separate bowl, add the MCT oil and salt to the full egg and whisk the until smooth.
Add the egg mixture to the chocolate/butter mix to form a smooth paste. Take the egg whites and slowly fold these into your paste just a little at a time ensuring you don't overwork the mixture.
For the cheesecake part its super simple! Just throw it all together in a bowl and mix!
Layer a baking tin with baking paper - I used a square tin but you can use any shape you like. To the tin add 3/4 of the chocolate mix, followed by the entire cheesecake mix & then the remaining chocolate mix on top. Swirl together with a fork to create a pattern which will remain during baking. Add to your pre-heated over and bake for 30 mins at 160C.
Once baked allow to cool on a cooling rack then cut into squares and try not to eat them all at once! Enjoy!
If you have the time you can make your own jam (recipe below) but there are some great options in the supermarket too, we love the St Dalfour range which are all made with 100% fruit and no nasty ingredients.
This is a super easy recipe, aside from separating the eggs you can pretty much throw everything together and bake.
To make the sponge cake you'll need:
Thats the hard work out of the way.......simple mix together the remainder of the ingredients with the egg yolks then fold into the whisked whites. Pop the mixture into two shallow greased cake tin (we used the standard 9 inch round kind) then bake for 20 mins at 160C.
Once baked leave to cool, the cakes need to be completely cool otherwise the fillings will melt into a sloppy mess!
Now for the fillings.
Homemade Jam (you can obviously use the shop bought kind as well)
We love blueberries because they're low in calories, full of nutrients and are basically the king of antioxidants. In fact, blueberries are believed to contain the highest antioxidant capacity of all commonly consumed fruits and vegetables.
However, this simple recipe will work with whichever fruit is your personal favourite.
It's completely sugar free and still tastes delicious! This recipe makes a good sized pot so you'll have plenty left over to use for further baking or just for your breakfast one day.
Purée the berries in a blender then add to a pan with the other ingredients. Bring to the boil slowly over a low heat then summer gently stirring regularly to avoid burning. When it begins to thicken (ours took 15-20 mins) take off the heat and leave to cool.
For the cream....
Well, its pretty simple really, choose your favourite cream, whip it up and slap it on. We used Natures Charm Coconut Whipping Cream because its dairy free and some of the people who were going to be eating this cake are intolerant to diary.
So, now for the fun part. Lets face it, its not rocket science - smother the top of one cake in jam and the bottom of the other in cream then sandwich them together.
Eat & enjoy!